FX Chain & Racks
Each track has an FX chain — an ordered list of audio processors applied to the track's signal.
Overview
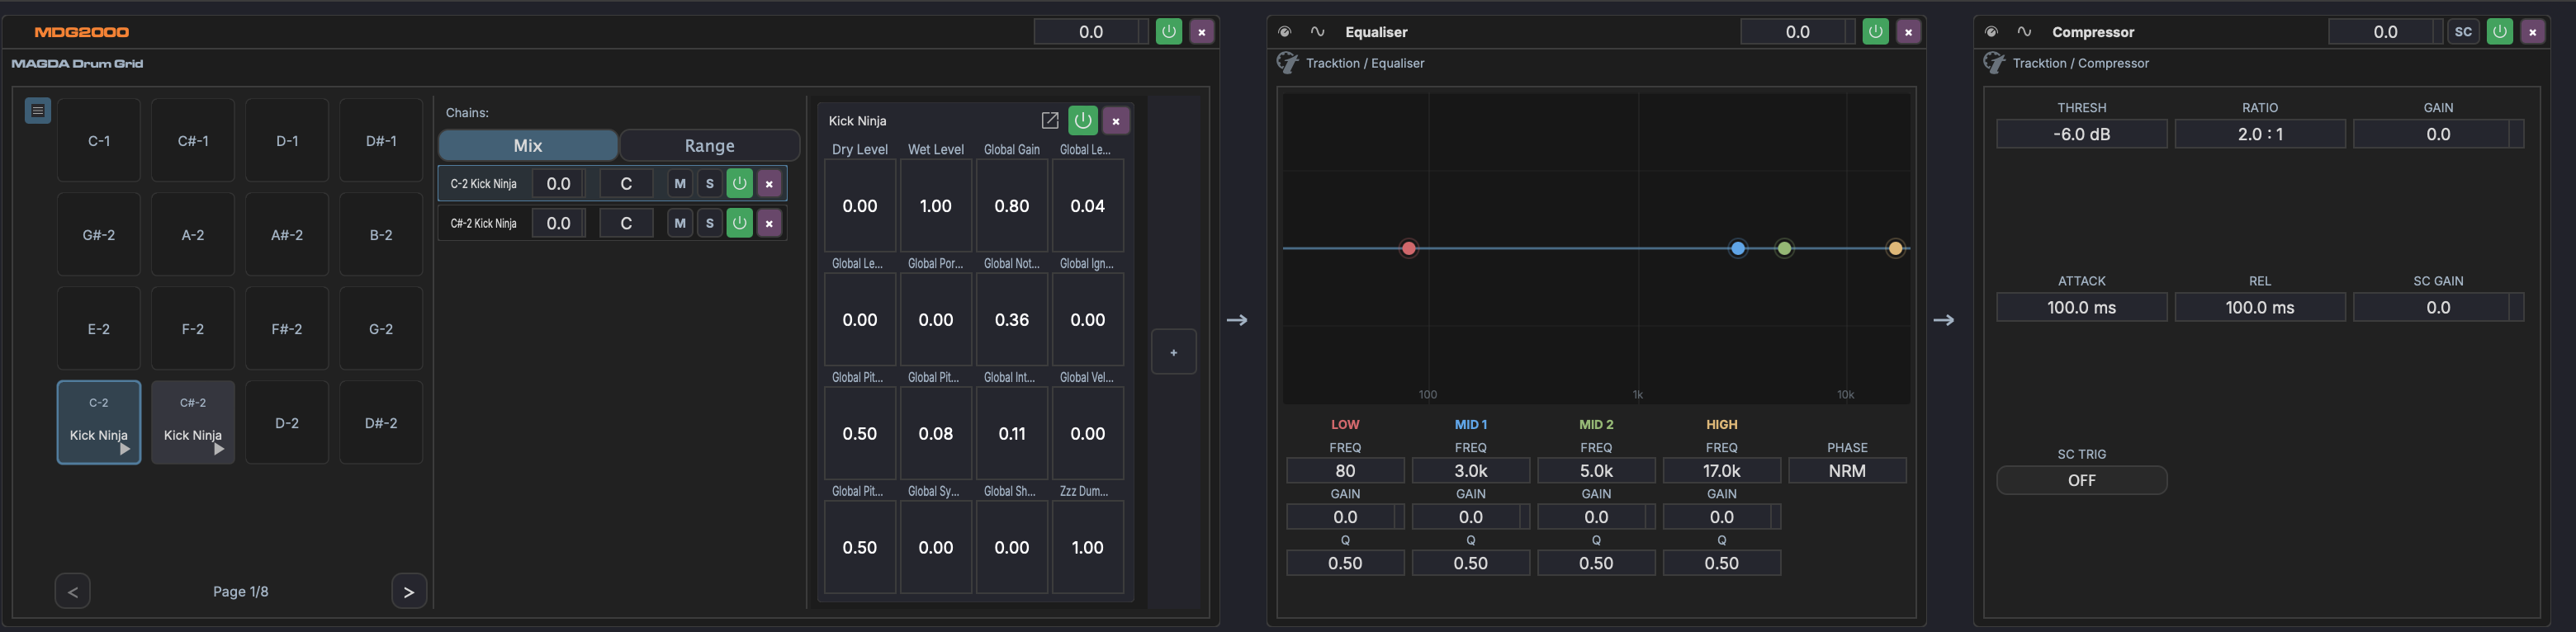
The FX chain is displayed in the bottom panel when a track or device is selected. Signal flows left to right through the chain.
Note
The chain header provides access to the track tree  , a hierarchical view of all devices and racks on the track. You can also click the rack button
  to create a new rack in the chain.
The chain can contain:
- Plugins — VST3, AU, or VST effect and instrument plugins
- Built-in devices — MAGDA's own processors (see Built-in Devices)
- Racks — Container devices with nested chains and parallel routing
Working with Devices
- Drag plugins from the Plugin Browser onto the chain to add them
- Drag devices to reorder them in the chain; hold Alt while dragging to copy instead of move (the cursor shows a copy badge)
- Click a device to select it and show its parameters; Cmd-click adds or removes a device from a multi-selection, Shift-click selects a range
- Cmd+D duplicates the selected device(s) in place
- Right-click a device for options: bypass, remove, replace, move to rack
- Each device has Mod and Macro buttons to toggle the modulation and macro panels
- Plugin devices have a Learn button that maps a control in the plugin's own UI back to the matching parameter slot — see Plugin Parameters
- Each device header carries a Δ delta-solo button — see Delta Solo
See Plugin Parameters for per-plugin parameter visibility, custom units and ranges, and AI-assisted classification.
Device Power
The power button in a device header takes the device out of the signal path. A chain's power button does the same for every device in it. Both states are part of the project: they survive save and reload, and they are honoured when you render — a device that is powered off is powered off in an exported or bounced file too.
The gain slider in a device or rack header ignores the scroll wheel until you click it. This keeps a stray trackpad gesture over a device header scrolling the chain rather than changing its gain. Once you have clicked the slider the wheel adjusts it, until the pointer leaves.
Delta Solo
The Δ button in a device header (tooltip Delta Solo: processed signal minus dry input) lets you hear only what that device changes: MAGDA subtracts the device's latency-aligned dry input from its processed output, so you audition the difference alone. It is the direct way to check exactly what a compressor, EQ, or saturator is doing to the signal.
Delta solo and bypass are mutually exclusive: turning on delta solo powers the device on, and powering the device off clears delta solo. The button lights cyan while active. Racks have their own delta-solo button in the same position (see Rack Controls).
Presets
Three preset systems share the device header:
MAGDA Presets (.mps)
Each device exposes a preset menu in its header. Saving a preset captures everything MAGDA knows about the device — parameter values, plugin state, macros, modulators, sidechain wiring, gain — in a single .mps file.
- Save Preset — pops a name + category dialog. The selected category becomes a folder under the preset directory.
- Load Preset — submenu organised by category. Loading replaces the live device's state in place; the device's id, name, and slot in the chain are preserved.
- The dialog auto-fills the most recently used name and category, so re-saving an iteration takes two clicks.
.mps is portable across MAGDA installations. The format is plugin-aware — loading a preset onto a slot whose plugin id doesn't match is rejected with a one-line error rather than silently overwriting state.
Plugin Disk Presets
When the device is a third-party plugin (VST3 / AU), MAGDA also scans the standard .vstpreset / .aupreset directories on disk and exposes them as a second menu in the header. The native preset format is used directly — your existing factory and user banks are picked up without a copy step.
The legacy "Program N" menu that VST3 plugins like Vital and Serum 2 expose has been retired — those entries resolve to identical state and provided no information. Disk presets are the only source.
Track Chain Presets
The track FX header carries a chain-level preset menu. A track-chain preset captures the entire chain — every device, every nested rack, every modulator binding — for a single track. Useful for stashing a finished mix-bus chain, a vocal chain, or a synth-and-FX combo and dropping it onto a fresh track later.
Racks
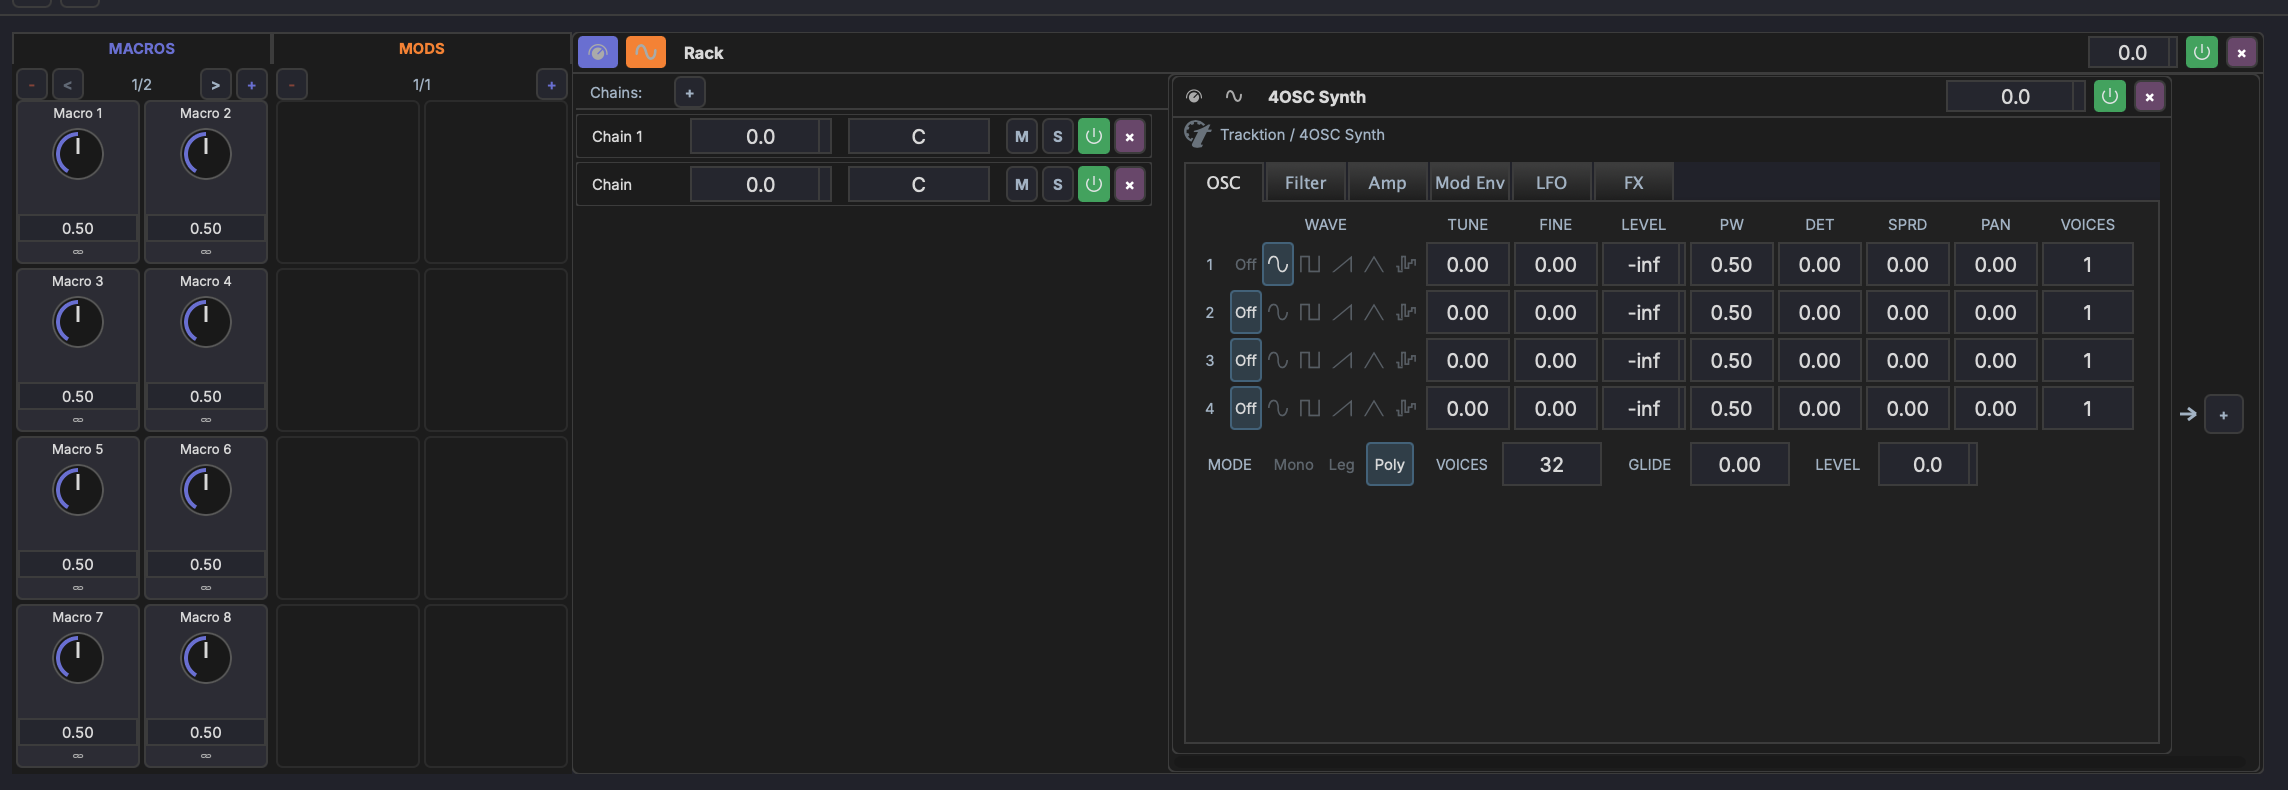
A rack is a container that holds one or more parallel chains. Signal flows into the rack, splits across chains, and mixes back together at the output.
Creating a Rack
- Click the rack button in the chain header
- Right-click a device and select Move to Rack to wrap it in a new rack
Chains
Each rack contains one or more chains displayed as rows. Each chain has:
- Volume — Level control for the chain's output
- Pan — Stereo positioning of the chain
- Mute (M) / Solo (S) — Mute or solo individual chains
- Devices — Each chain has its own ordered list of devices
Click the + button next to "Chains" to add a new parallel chain. Double-click a chain's name to rename it.
Select multiple chains with Cmd-click (toggle) or Shift-click (range). When more than one chain is selected, editing volume, pan, mute, solo, or bypass on any selected chain applies to the whole selection — volume and pan shift each chain by the same amount from its own value, so their relative balance is preserved.
Use Cases
- Parallel processing — Blend dry and wet signals (e.g., parallel compression)
- Multi-band processing — Split signal into frequency bands with different processing
- Organized grouping — Keep related devices together in a collapsible container
Rack Controls
- Volume — Master output level for the entire rack
- Mod / Macro buttons — Access the rack's own modulation and macro panels
- Delta Solo (Δ) — Hear the whole rack's processed output minus its dry input (tooltip Delta Solo: processed rack signal minus dry input). Works on nested racks and stays available when the rack is collapsed. See Delta Solo.
- Collapse/Expand — Click the rack header to toggle between collapsed and expanded views
Collapsible Devices
Individual devices inside a rack can be collapsed to save space. Click the collapse button on a device to shrink it to a compact header. The rack resizes dynamically as devices are collapsed or expanded. Collapsed states are preserved when the chain rebuilds (e.g. when adding or removing devices).
External Hardware Inserts
MAGDA can route a track's signal out to outboard gear and back, treating a hardware unit as an insert in the chain. Two entries live under the External category in the Plugin Browser:
- External FX — sends audio out to an outboard effect and returns its processed audio.
- External Instrument — sends MIDI out to a hardware synth and returns its audio.
Drag either onto a track's chain, then set its routing in the device slot:
| Control | Purpose |
|---|---|
| Send to / MIDI to | The hardware output to feed (audio out for External FX, MIDI out for External Instrument) |
| Return from | The audio input the hardware comes back on |
| Latency (ms) | Manual trim to align the return with the rest of the mix (default 0.0) |
Picking a hardware port that is currently disabled enables it automatically, and ports that no longer feed any insert are disabled again for you. If two inserts fight over the same port, a warning line appears in the slot (for example Return uses the same port as the send).
For an External Instrument, the track's own MIDI-out and audio-in selectors become read-only mirrors of the insert's routing, and MAGDA blocks the synth's MIDI from being recorded straight back in so you don't get doubled or hanging notes.
Export captures the hardware automatically
Because outboard gear isn't part of an offline render, MAGDA captures it for you. When you export a project that contains a routed insert, it first plays the export range once in real time to record the hardware returns (a progress box titled Capturing External Hardware appears, with a Cancel button), then substitutes those captures into the offline render. Nothing is added to your project and there is no freeze step to manage.
Post-FX Section
In addition to the main FX chain, every track and the master have a post-FX area, a stage that runs after the main chain. It is the natural home for meters and analyzers, but any effect can live there.
Toggle the post-FX area from the buttons in the track chain header, then drop an Oscilloscope or Spectrum Analyzer, or any effect, into it. The panel opens automatically when a track has post-FX devices.
Which side of the fader it runs on
By default the post-FX area runs after the track fader, so a meter there reads the level you are actually sending on. The PRE FADER / POST FADER tag under the + button on the panel's add strip shows the current side and switches it for that track. The whole section moves together; sends keep their own pre/post-fader setting either way.
Master is always pre-fader, so the tag does not appear there. To choose the side new tracks start on, use New tracks run post-FX after the fader in Preferences.
Note
Each analyzer kind is unique per track in the post-FX area — one Oscilloscope and one Spectrum Analyzer at most — while regular effects can repeat.
Gain Staging
Gain staging trims the output of every device in a chain so the whole chain holds a target headroom, without adjusting each one by hand.
Open it from the gain-staging button in the track chain header, set your target peak (default -12 dBFS), play a representative section of the song, and stop. MAGDA works out the trims:
- It only attenuates, never boosts.
- It carries the gain forward down the chain, so later devices see consistent levels.
- Every fader it moves stays marked so you can see the pass at a glance, until you change it or run another pass.
The whole pass is a single undoable step. An optional AI pass can weigh limiters and saturators in the chain instead of applying a flat target.