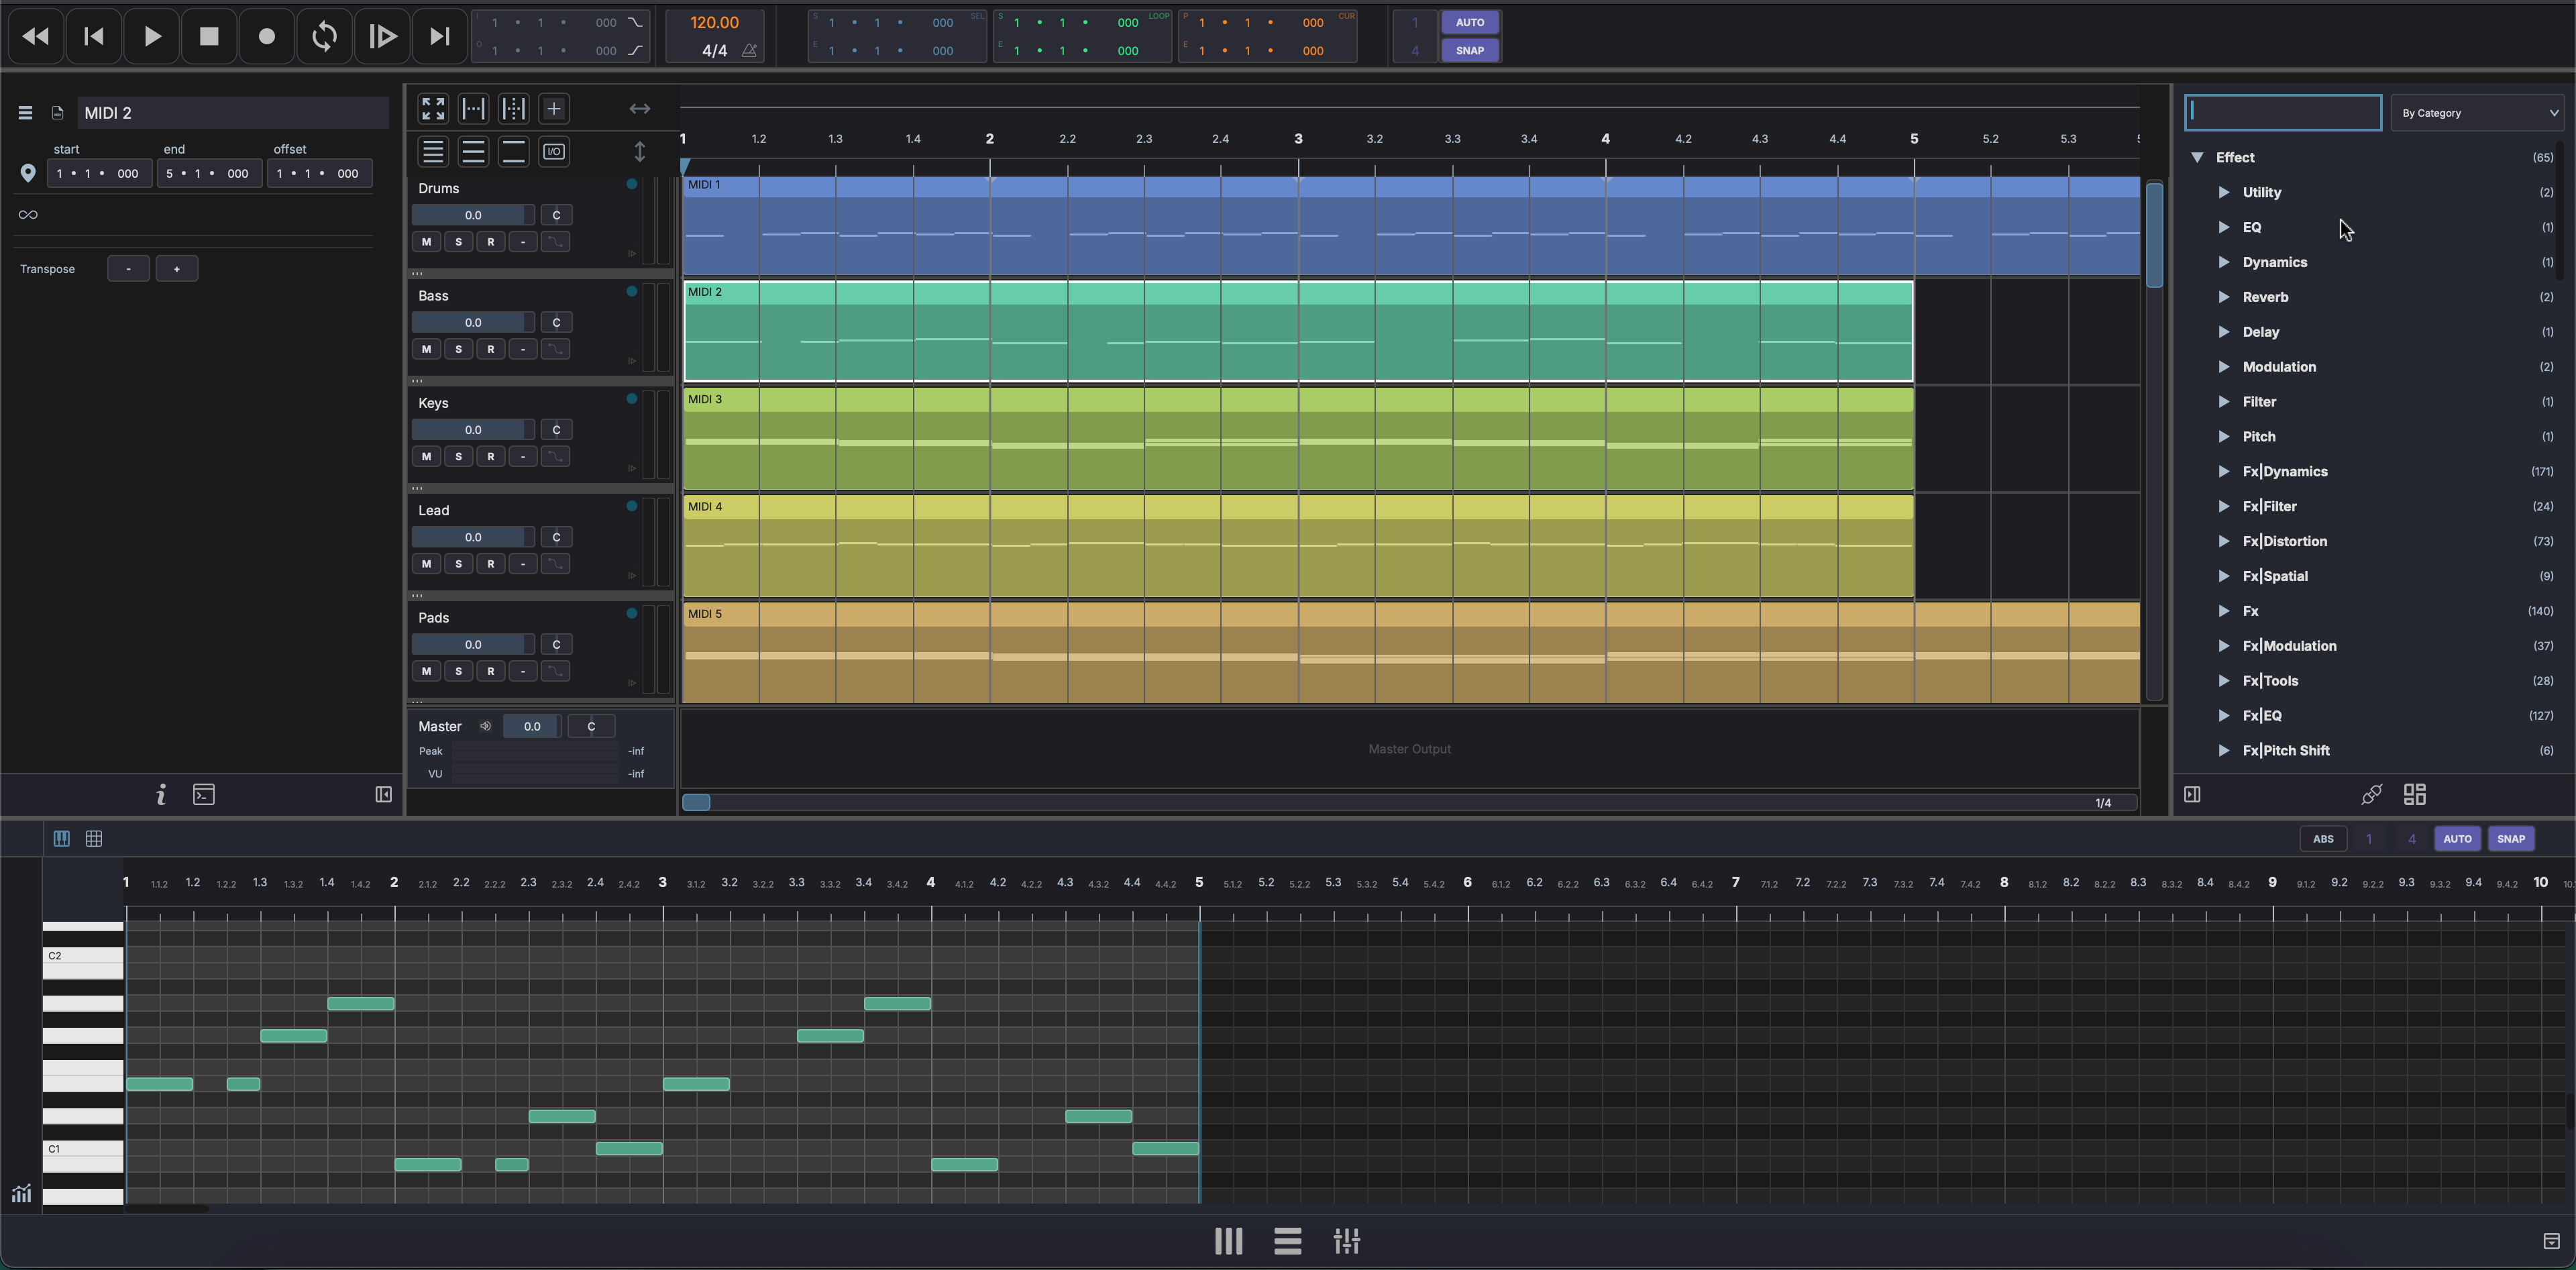
Arrangement View
The Arrangement View is a traditional DAW timeline for composing, recording, and editing. Switch to it by clicking Arrange in the footer bar.
Layout
┌─────────────────────────────────────────────┐
│ Timeline ruler (bars / beats / time)        │
├──────────┬──────────────────────────────────┤
│ Track    │                                  │
│ Headers  │   Track Content (clips on        │
│          │   the timeline)                  │
│  Name    │                                  │
│  Color   │         ▼ Playhead               │
│  M S R   │                                  │
├──────────┼──────────────────────────────────┤
│ Aux      │   Aux track content              │
├──────────┼──────────────────────────────────┤
│ Master   │   Master waveform                │
└──────────┴──────────────────────────────────┘
- Track headers (left) — Track name, color, mute/solo controls. Resizable width.
- Track content (center) — Clips displayed on the timeline. Scrollable horizontally and vertically.
- Timeline ruler (top) — Shows bars, beats, and time markers.
- Playhead — Vertical line showing the current playback position, always on top.
- Aux tracks — Auxiliary/bus tracks in a fixed section above the master.
- Master track (bottom) — Master output with its own resizable row.
Toolbar
The corner toolbar provides quick access to:
- Zoom to fit / Zoom to selection / Zoom to loop
- Track size presets (small, medium, large)
- Add track
- I/O visibility toggle
- Show / hide marker lane (see Markers)
- Show / hide seconds ruler (see Timeline Ruler)
Working with Clips
- Move — Click and drag a clip along the timeline or between tracks
- Resize — Drag the edges of a clip to trim it
- Select — Click a clip to select it; Cmd-click (Ctrl-click on Windows/Linux) to toggle clips in the selection; Ctrl+A (Cmd+A) to select all
- Delete — Select a clip and press Del or Backspace
- Erase — Shift+Ctrl-click a clip to delete it directly without selecting first
- Duplicate — Ctrl+D (Cmd+D) to duplicate selected clips
Drag audio files from the Media Explorer directly onto a track to import them as clips.
While recording, the growing clip previews in real time: MIDI notes appear in the lane as you play them, and audio shows its waveform as it is captured, so you can see the take taking shape before it is committed.
Multi-Sample Drag and Drop
You can drag several samples out of the Media Explorer at once — Shift-click to extend the selection, Cmd-click (Ctrl-click on Windows/Linux) to toggle individual files, then drag any item in the selection.
- Drop on empty area — one new track is created per sample. While dragging, ghost track-header previews appear in the correct palette colours each new track will take.
- Drop on an existing track — the samples are appended as sequential clips on that track, in selection order.
Ghost clips shown under the cursor during the drag reflect each sample's actual audio duration, so you can align the drop with the grid before releasing.
Markers
Markers are named flags on the timeline that label sections of the song — Intro, Chorus, Drop. Toggle the marker lane with Show marker lane in the corner toolbar; it sits as a strip above the timeline ruler.
- Add — right-click the marker lane and choose Add Marker. The marker lands at the playhead.
- Rename — double-click a marker, or right-click it and choose Rename...
- Reposition — right-click → Edit Position... to set an exact bar/beat.
- Colour — right-click → Colour to pick from the palette.
- Delete — right-click → Delete Marker.
When a marker scrolls off the left edge, its name stays pinned at the edge of the lane so you always know which section you are in.
Song Navigator
The song navigator is a minimap in the master content strip showing the whole arrangement at a glance: a compressed overview of the track clips, the timeline markers as vertical lines, the playhead, and a viewport rectangle marking the part of the song currently visible in the main view.
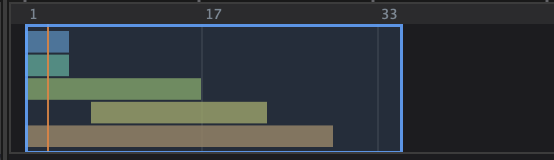
- Click anywhere in the minimap to jump the view there.
- Drag the viewport rectangle to pan the arrangement.
- Drag its left or right edge to zoom the main view in or out.
Timeline Navigation
Scrolling
- Horizontal scroll — Move along the timeline (mouse wheel or scroll gesture)
- Vertical scroll — Navigate between tracks
- Follow playhead — When enabled, the view scrolls automatically during playback to keep the playhead on screen. Turn it on in Preferences under Transport ("Follow Playhead").
Timeline Ruler
The ruler above the tracks shows bars and beats, with the loop region and playhead in their own rows below. Toggle Show seconds ruler in the corner toolbar to add a second row that reads the same positions in seconds — useful when lining up to picture or a fixed running time. The seconds row is display-only; it sits above the bars row and disappears again when toggled off, letting the bars row fill the height.
Zooming
- Horizontal zoom — Ctrl++ / Ctrl+- (Cmd++ / Cmd+- on macOS) or use the zoom scrollbar
- Vertical zoom — Change track height using the toolbar presets (small, medium, large)
Toolbar Zoom Actions
- Zoom to fit — Fit all content in the visible area
- Zoom to selection — Zoom into the current time selection
- Zoom to loop — Zoom to the loop region
Selection
- Time selection - Click and drag on the timeline ruler to select a time range. The selection is drawn as a spotlight: everything outside the range dims while clip colours stay true, and the range edges read as near-white. Drag the endpoint handles to adjust the range.
- Loop region - Set from the selection with Ctrl+Shift+L (Cmd+Shift+L). It is drawn as a quiet rail with bright glowing caps at each end, the same in the arrangement ruler and in the clip-editor ruler. Drag the caps to move the loop bounds.
Playhead
The playhead shows the current playback position. Click on the timeline ruler to reposition it. Press Home to return to the start. The play and edit cursors are drawn a consistent near-white across every editor.
Edit Cursor
The edit cursor is a white blinking line separate from the playhead. Place it with Alt+click on the timeline ruler or inside a clip. It marks the position for operations like Split (Cmd+E). Press Esc to hide it. The MIDI editor has its own independent edit cursor — placing one in the piano roll or drum grid does not affect the arrangement cursor.
Editing Modes
MAGDA supports two editing modes depending on context:
Clip-Based Editing
When no time selection is active, editing operations apply to selected clips:
- Split (Cmd+E) — Splits selected clips at the edit cursor position
- Render (Cmd+B) — Renders selected clips to audio in place
- Cut / Copy / Paste / Duplicate / Delete — Operate on the selected clips
Time Selection Editing
When a time selection is active (drag on the timeline ruler), operations apply to the time range:
- Split / Trim (Cmd+E) — Splits clips at the selection boundaries and isolates the selected region. If clips extend beyond the selection, they are trimmed.
- Render Time Selection (Cmd+Shift+B) — Consolidates everything within the time selection to a single audio clip per track
- Cut / Copy / Paste — Operate on the content within the time range
Note
When a time selection exists, Split/Trim affects all clips that overlap the selection — not just selected clips. Clear the time selection to return to clip-based editing.
Range Editing
Range edits work on a span of time and ripple everything after it, rather than editing clips in place. They act on the current time selection or the loop range.
| Operation | What it does |
|---|---|
| Insert Time | Opens a gap at the selection and pushes later clips to the right, splitting any that straddle the insert point. |
| Duplicate Time Range | Copies the selected span and ripple-inserts the copy directly after it. |
| Duplicate Loop Range | Same as above for the loop span. A grow-vs-advance option in Preferences chooses whether the loop grows to cover the copy or advances past it. |
| Split All Tracks at Cursor | Splits every track at the edit cursor. |
A Range Editing submenu, in the Edit menu and in the right-click menus on clips and on empty arrangement space, offers Copy, Cut, Delete, and Paste (Ripple) for both the time selection and the loop range.
Range operations ripple the global tempo, time-signature, and pitch-bend curves along with the clips, so tempo and key changes travel with the music instead of staying pinned to the timeline. Beat-anchored clips keep their bar and beat position under the shifted tempo map. Markers ripple along with the clips on global operations.
Editing
Cut, Copy, Paste
| Action | Shortcut |
|---|---|
| Cut | Ctrl+X / Cmd+X |
| Copy | Ctrl+C / Cmd+C |
| Paste | Ctrl+V / Cmd+V |
Split and Join
- Split — Position the edit cursor and press Ctrl+E (Cmd+E) to split the clip at that point. If a time selection is active, clips are trimmed to the selection.
- Join — Select adjacent clips and press Ctrl+J (Cmd+J) to merge them.
Duplicate
- Duplicate clips — Ctrl+D (Cmd+D) duplicates selected clips
- Duplicate track — Ctrl+D with a track selected duplicates the track and its content
- Duplicate track (empty) — Ctrl+Shift+D (Cmd+Shift+D) duplicates the track structure without content
- Duplicate track (content only) — Ctrl+Alt+D (Cmd+Alt+D) duplicates the track's clips onto a new track with an empty FX chain
Render
- Render clip to audio — Select a clip and press Ctrl+B (Cmd+B) to bounce it to an audio file
- Render time selection — Press Ctrl+Shift+B (Cmd+Shift+B) to render the selected time range
Undo / Redo
| Action | Shortcut |
|---|---|
| Undo | Ctrl+Z / Cmd+Z |
| Redo | Ctrl+Shift+Z / Cmd+Shift+Z |
Project Settings
Open File → Project Settings to set options that belong to the project itself rather than the application:
| Setting | Options |
|---|---|
| Total Length | Song length in bars (16–4096, in steps of 16) |
| Sample Rate | 44100, 48000, 88200, 96000, 192000 Hz |
| Render Bit Depth | 16-bit, 24-bit, 32-bit float |
| Bounce Bit Depth | 16-bit, 24-bit, 32-bit float |
Tick Save as default for new projects to apply the same values to new projects from now on. These settings are stored per project, so different songs can carry different lengths and render formats.